Antons Video Productions
4 Woolpack Street
Braemar 2575 Southern Highlands
NSW Australia
+61 2 418 626 417
White Balance with the EDIUS 3-Way Color Correction Filter
1. Drag the 3 way color correction filter onto a problem clip such as incorrect camera white balance
2. Double click the filter in the information palette to open the 3 way color corrector
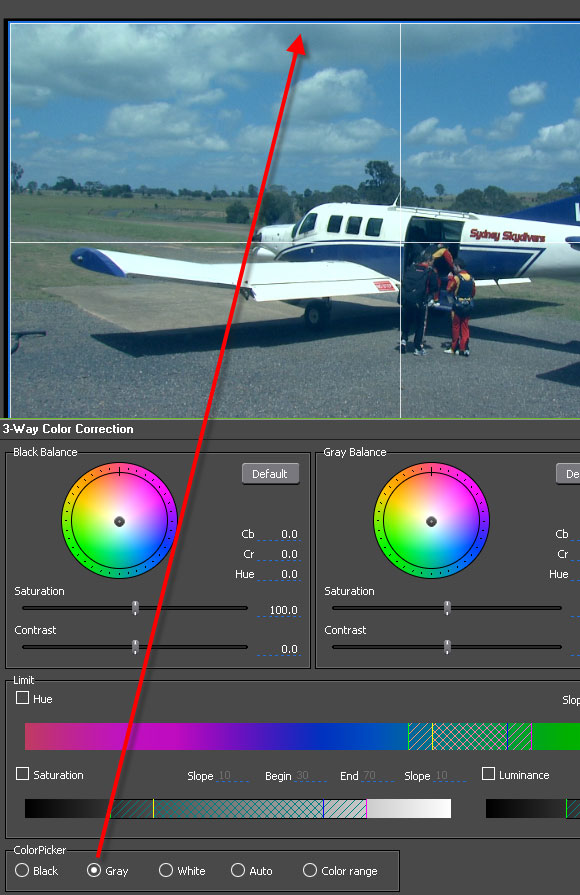
3. Click the gray radio button and then click something in the preview window that should be gray such as a cloud (this does the major correction) (see also accurate sample)
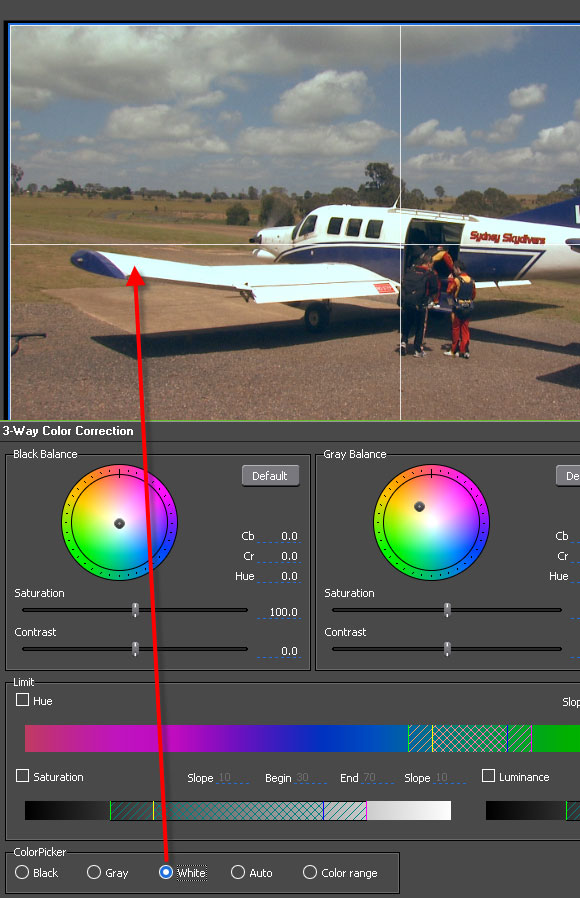
4. Click the white radio button and then click something in the preview window that should be white such as the wing
5. Click the black radio button and then click something in the preview window that should be black such as the tyre
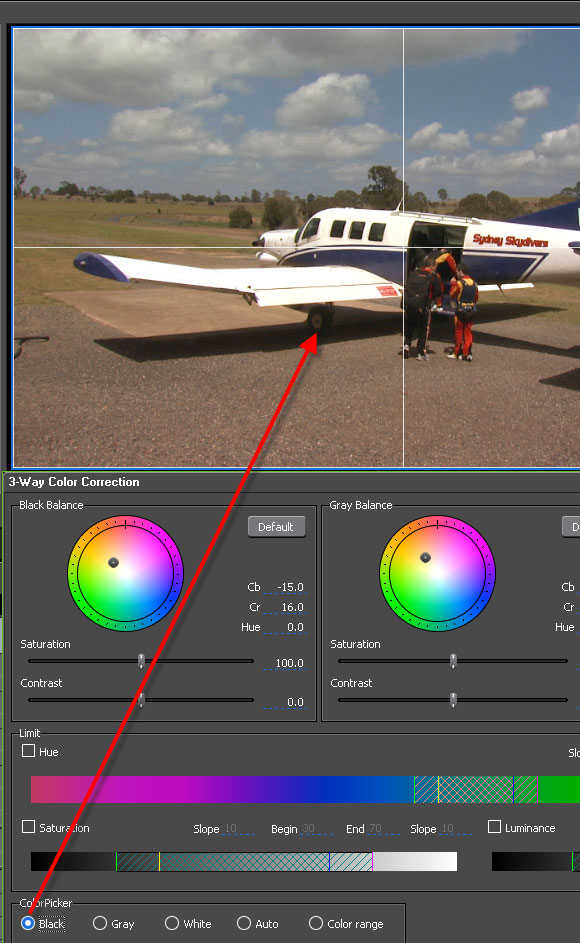
6. Compare before and after by unticking and ticking the filter in the info palette
View a video of the above steps white-balance.avi (28mb)
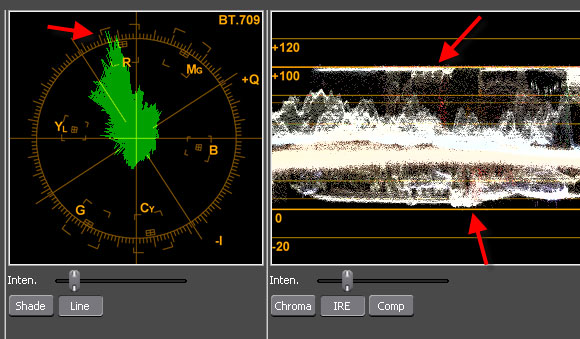
7. You may now have a look at the result in the waveform monitor to see if levels are satisfactory. Switch the Waveform monitor to IRE mode and Line mode.
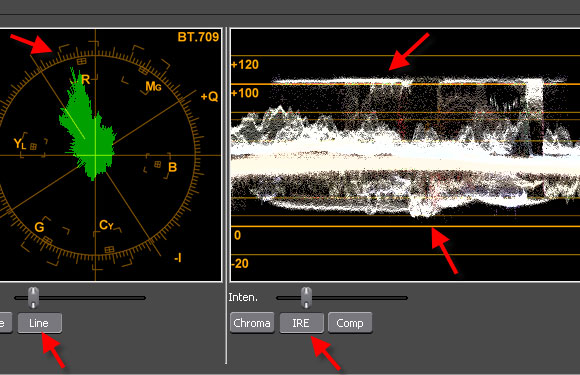
Notice that the Chroma could be increased and the darkest sections of the luminance are not touching 0 IRE and the brightest sections are exceeding 100 IRE
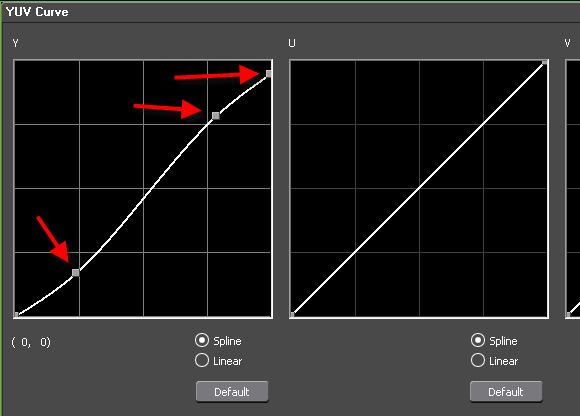
8. Apply YUV curve filter and reduce the highest point a bit until nothing exceeds 100 IRE and create a gentle S curve until the darkest part touches O IRE at the same time the brightest part reduction is compensated (lifted) by the S bend
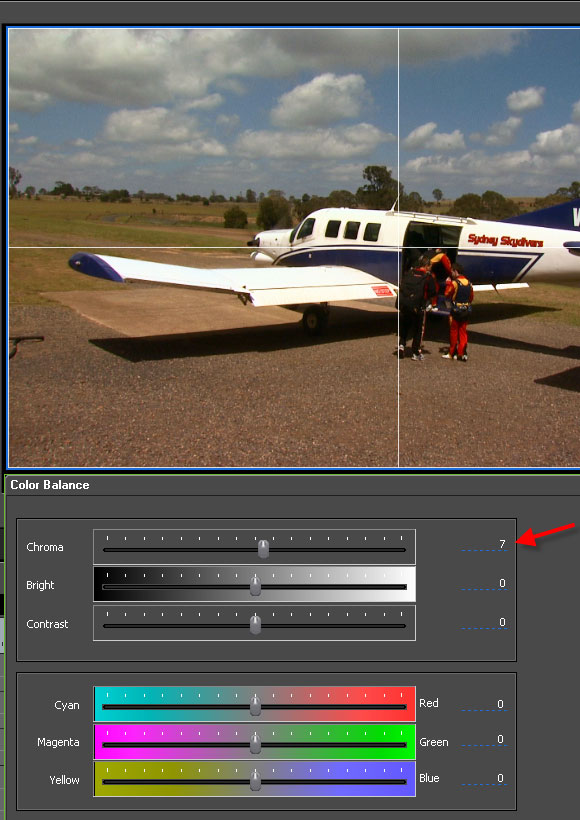
9. Apply the Color Balance Filter and increase the Chroma Level slightly until the level comes near the maximum allowed, this can be seen by the little rectangular boxes just outside the circle in case of HD, when editing SD, these boxes are just inside the circle.
The result should look like this on the Waveform Monitor
Back to more Video Editing Tips and Tricks