Antons Video Productions
20 Solander Ave
West Hoxton 2171 NSW, Australia
+612 9825 9999
Creating and Restoring a Windows7 Image
Creating a Windows7 Image is the best solution to have a complete backup of the C drive in case of drive failure or in case you wish to replace it with a larger or faster drive such as SSD (Solid State Drive). When using the following steps to create and restore a Win7 Image, all software including the Operating System will remain activated.
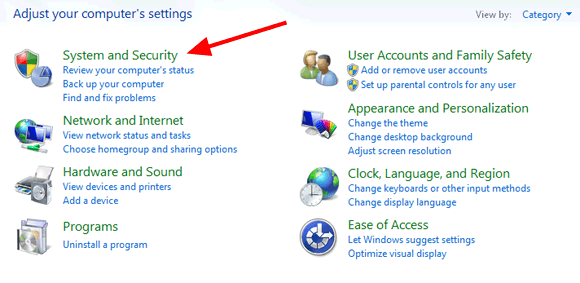
1. Go to Control Panel and click System and Security
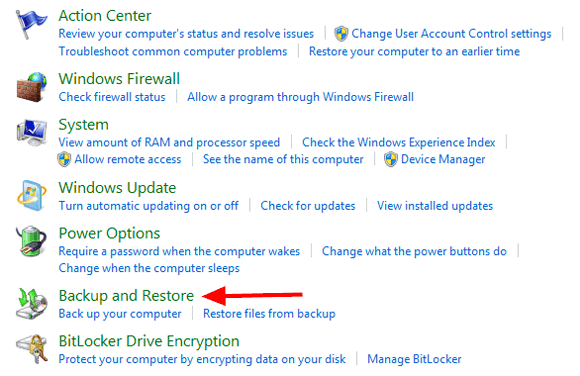
2. Click Backup and Restore
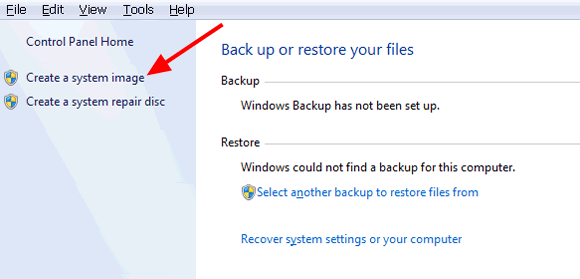
3. Click Create a system image
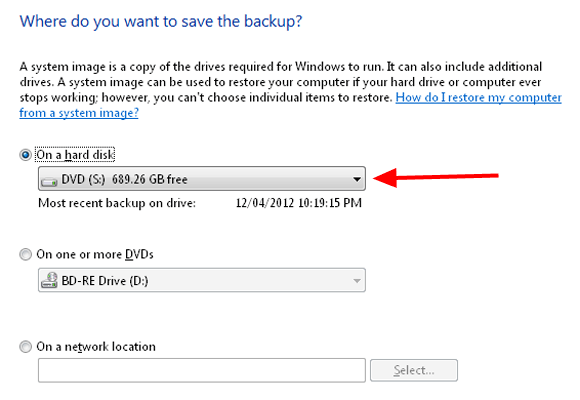
4. Windows will scan for a suitable internal drive to save the image to. You can browse for another drive in case you are not happy with the Win7 suggestion, but never select a Raid such as Raid0 or Raid5. The backup drive must be a basic drive and not a dynamic drive. Once you have decided, click next.
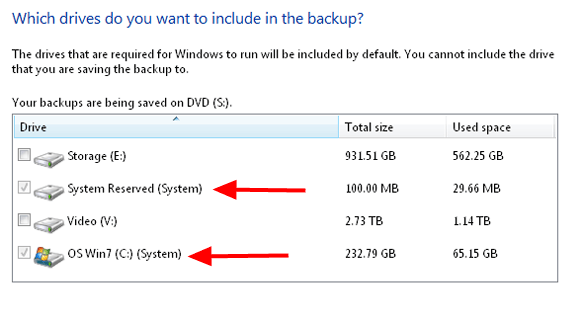
5. Windows will automatically select the C drive and the system reserved 100 MB space, both must be selected and nothing else, then click next.
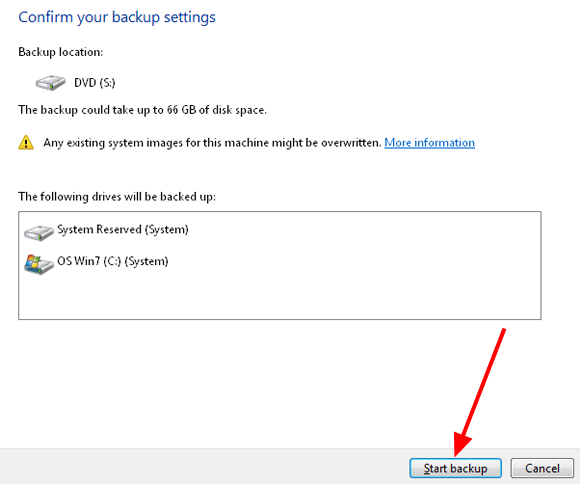
6. Confirm your settings, then click start backup, should take around 10min or less depending on how much data you have on the C drive.
Restoring C Drive from an existing Image
There are several reasons for restoring a drive such as a Virus, a drive failure, or a desire to replace the drive with a larger or faster one. It is important that the new drive is a similar or larger size and not smaller, otherwise image restore will fail.
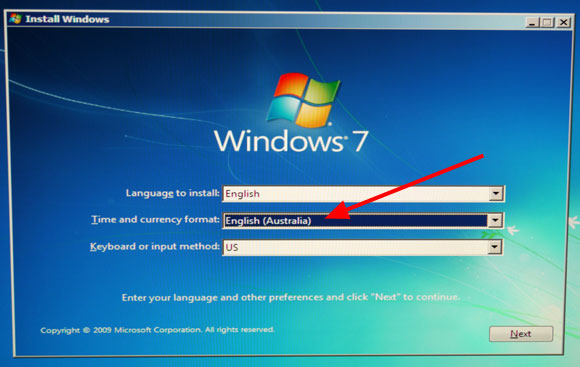
1. Shut down PC, replace hard disk if needed, start the PC and immediately insert the Win7 DVD, then press any key at the prompt to boot from CD or DVD (If you do not get this prompt, fix the order of drives in the BIOS so that the DVD drive is before the C drive. Windows will now load required files from DVD, then choose your Time and Currency and click next when done.
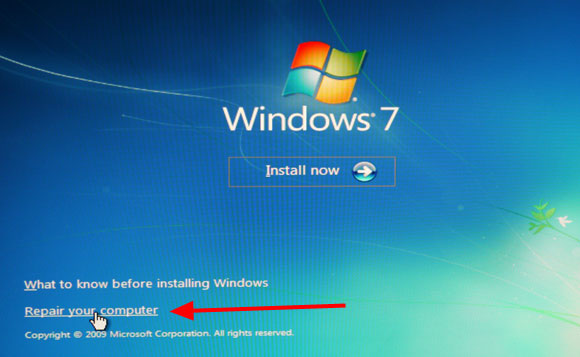
2. Click repair your computer
3. Windows will scan for existing Windows Installations, it will not find one if you inserted a new blank disk, this is OK, it will automatically choose Restore.
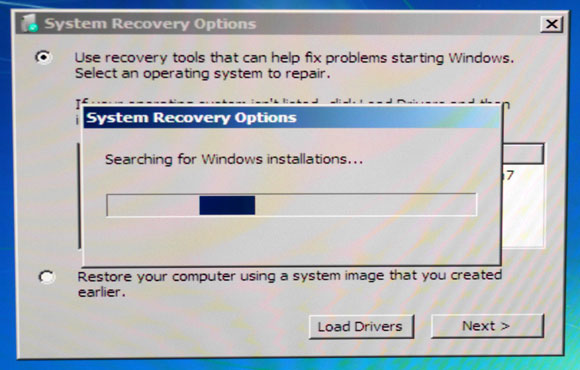
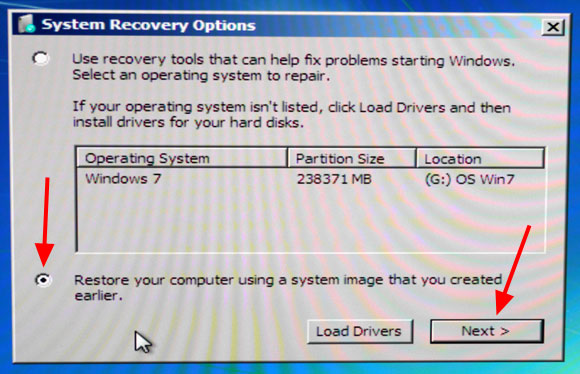
4. Click restore your computer using a system image, then click next.
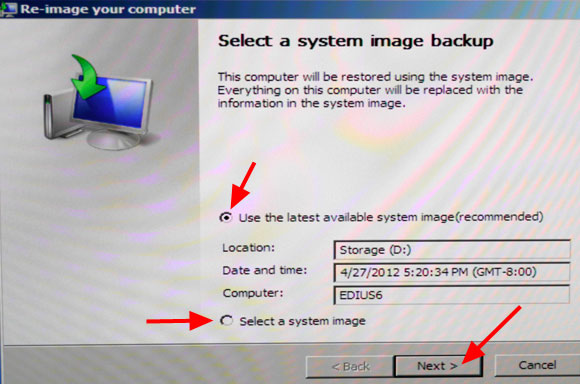
5. Windows finds the newest image, however you can choose another image if you have one by choosing select a system image.
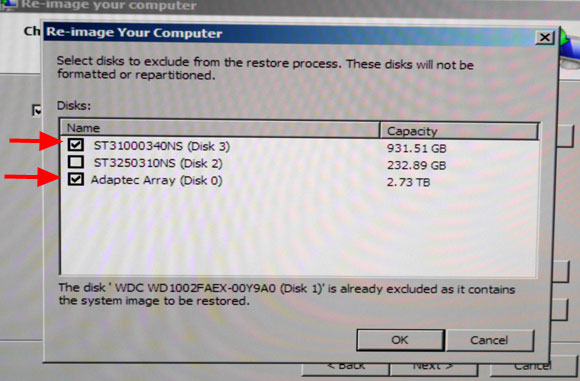
6. Select format and repartition disks and then click the Exclude disks option.
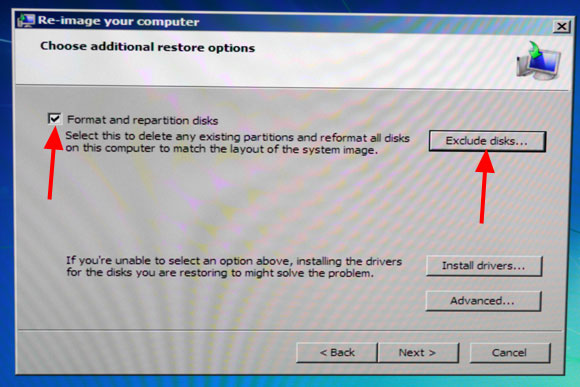
7. Select all disks shown except the one that will be restored. Using this method will ensure that no other disks will be accidentally formatted.
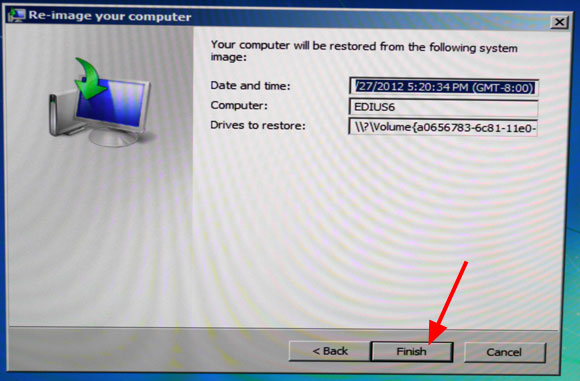
8. Click Finish to start the restore process.
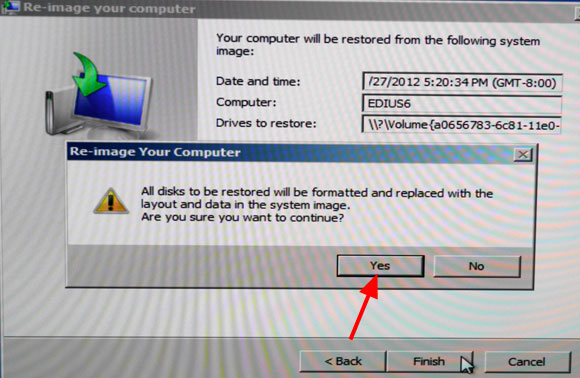
9. A final confirmation will appear, click yes.
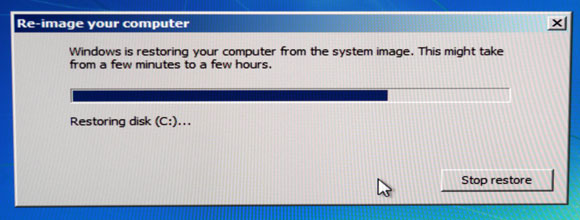
10. The progress indicator will give you an idea of time required, usually 10min or less.
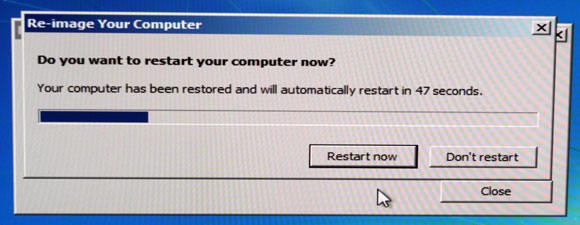
11. The Computer will automatically restart when finished, you can then remove the Win7 DVD, if you replaced the drive with a new one, Win7 will ask you to reboot after initial startup and installing the driver for the new drive, If the new drive is SSD, reboot will not be requested.
Back to more Video Editing Tips and Tricks